If HTML defines the content and structure of webpages, and CSS specifies the visual layout,
JavaScript
adds behavior and interactions. It’s the
Without JS, the only interactions with our webpage would be to click on hyperlinks or hover over things. How boring would that be? Just a few things you can do with JavaScript: change HTML and CSS on the fly, add animations, and validate form submissions.
What we do
We’re going to create a blank JavaScript file and add a link to an HTML document that points to our JavaScript file.
Why we do
This is part of the basic set-up of your files. We’re telling the browser there’s JavaScript at play here, kind of like you might have done for CSS. Once you include the link, your JavaScript will affect your webpage. Without it, the browser would never know the file’s there.
How we do
- Create a blank file called index.html in your project directory. Check out the HTML lesson if you need a refresher on project directories or the structure of a basic HTML file.
- Create a blank file called script.js in your project directory.
- Open the index.html file in your text editor, add your basic HTML structure, and then paste the following line right before the closing </body> tag.
Test your connection
Before we continue, let’s make sure that we’ve done our set-up properly. In your script.js file, add the following:
Save the file and open index.html in a browser. If the script file is linked to index.html, you’ll see a pop-up or alert box with the message “it lives!”—that’s what the alert function does! If you’re not seeing it, just double check your file structure and make sure you don’t have any typos.
Where a program is a list of instructions to a computer, a function is the named section of a program responsible for a certain task. You can think of functions as the bullet points making up the list of instructions of a program. Functions can be built-in (like the alert function in JavaScript), meaning that they’re prewritten and part of the programming language you’re writing in, or they can be custom, meaning you can write and name your own functions from scratch so that they do whatever you want.
What we do
Before we can do anything too fancy, we need to spend some time with the fundamentals. This means data types. We’ll dive into different data types, walk through writing your first JavaScript file, and give you some tips for working in the browser.
Why we do
Data types are the building blocks of programming, and they’re everywhere! Let’s take the Amazon homepage as an example. Some of these elements are the same for everyone—the menus, the items for sale. But some are specific to you —your name, the number of items in your cart, etc. These are variables: little pieces of data stored away, and easily changed based on the user and her behavior.
How we do
The three basic data types are:
-
Strings
(i.e. “Hello, Nicole”) - a string is anything you put in between quotations “” and are typically used to represent text

If you’re logged into your Amazon account, in the top right corner you’ll see that your name is displayed as a string.
-
Numbers
(i.e. 6) - a number can be negative or positive

The shopping cart icon shows the number of items you currently have selected to purchase.
-
Booleans
(i.e. true) - a boolean value represents logic and can only take one of two values: true or false
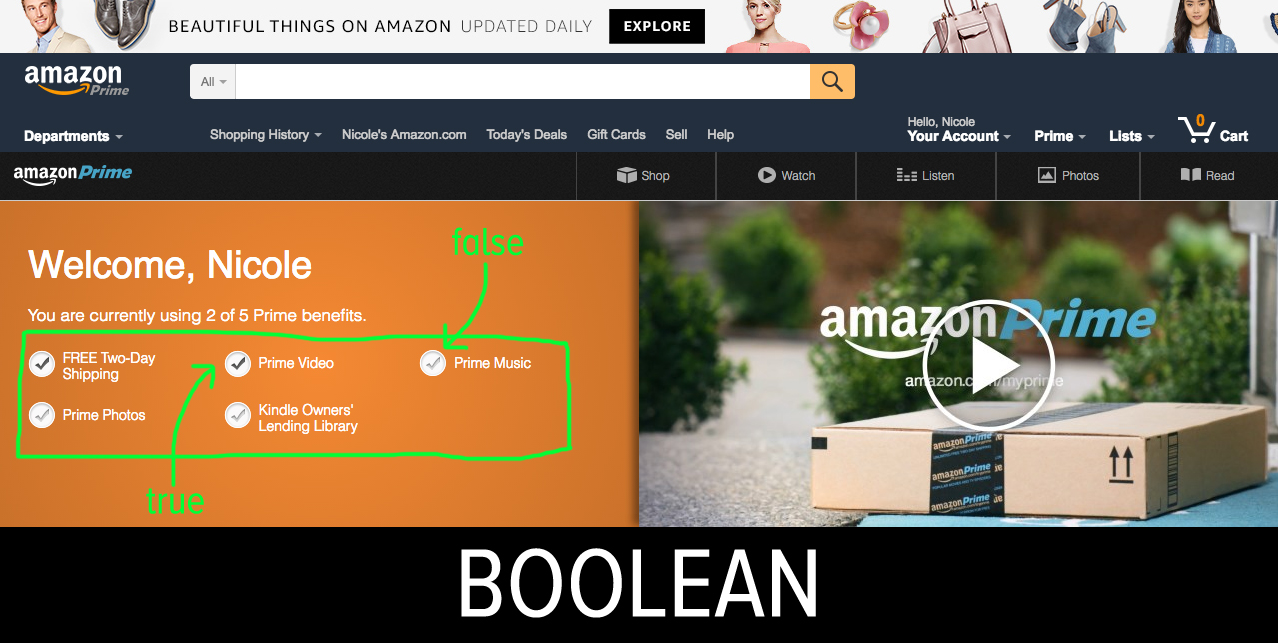
If you’re a Prime user, the page shows a checklist of the Prime benefits. Each of these checked items represent a boolean . You’ve either used the Prime benefits (Free Two-Day Shipping, Prime Video, Prime Music, Prime Photos, Kindle Owners’ Lending Library) or not.
Let's see them in action!
-
Open up your script.js file and replace the alert with the following, then save:
console.log("hello world"); console.log(123); console.log(true); - Open your index.html file in a web browser.
- You won’t see anything on the page because you haven’t added anything to the HTML document, but if you right click anywhere on the page and click “Inspect,” a window pane will appear in your browser.
-
Click the “console” tab in that window and you’ll see the following output:
"hello world" 123 true If you get an error like “Uncaught SyntaxError: missing ) after argument list”, retype the quotes around “hello world”. Sometimes copying and pasting between different text editors messes up special characters like quotes.
What we do
The console is a powerful

Why we do
Console.log comes in handy for
How we do
Console.log is a built-in JavaScript function that “prints” to the console anything you put in its parentheses—it “logs” things to the “console” (we said the thing!). The console is like the scribble test of a pen just to make sure that things are (1) working and (2) working in the intended way. In addition to using console.log() in your script files, you can also type directly into the console. You can think of the console like scratch paper. You use it to test out code before you commit it to your files, or to see what variables have what values.
To make sure that what we output to the console are indeed the right data types, we will use the “typeof” function. This will output the data type of whatever we pass to it.
You can
- Single-line comments i.e. // this is a comment
- Multi-line comments i.e. /* multi-line comment */
Add the following code below the code you just commented out:
When you open up the browser, you’ll see the data types output in the console:
You want to make sure that you’re using the right data types so that you can take advantage of built-in JavaScript functions specific to those data types. For example, it’s much easier to increase the number of items from 5 to 6 in your Amazon shopping cart rather than converting and overwriting a string representing the same information. (The character representing the number is not the same as the number. There’s your deep thought for the day.)
What we do
Now that we know what data types we have to work with, we’ll introduce handy built-in functions, as well as some basic logic in JavaScript.
Why we do
Besides data types, the other major component of programs is control flow, which determines the program’s order of execution and what to do with those data types. This is important because programs do not always execute in a linear way. Take websites like Pinterest or Quora that only show limited posts to non-logged in users—
How we do
There are additional built-in functions you can do to manipulate these data types. You can do math with numbers (which is also programming!). Just like in regular math, everything is evaluated in the order of operations. Add the following to your script file:
With strings, which are just sequences of characters wrapped in “”, you can use the following to return the length of the string (the number of characters):
With booleans, you can use comparison operators to evaluate expressions to true or false (all booleans will eventually evaluate to either true or false):
- > greater than
- < less than
- == equal to (compares the values, but not the object types)
- === equal to (compares the values AND object types)
- !== not equal to
- >= greater than or equal to
- <= less than or equal to
What we do
We’ll talk about different types of variables, how to use them, and some of the common errors you might run into when dealing with them.
Why we do
Variables work the same way as you probably learned in algebra (many, many years ago). They’re ways of abstracting and storing data. Let’s take the below example that calculates the remaining seats in an auditorium:
Because you can assign and reassign values, variables are useful because they can basically be used for storing arbitrary information that can be reused or accessed throughout the program. The empty_seats variable will represent the right result even if we enter new values for the variables “audience” and “seats.”
Variables are usually given descriptive names in programs in order to clearly define their purpose. For example, in our above calculation, a variable empty_seats explains the value it stores better than a generically-named variable x .
How we do
To help us keep track of things, variables are declared and can store data with the preceding word var . Unlike Michael Scott in The Office declaring bankruptcy (“You can’t just say the word bankruptcy and expect anything to happen”), declaring variables actually does make a difference.
This is the browser’s way of saying “I have no idea what ‘bankruptcy’ is” because we never told the browser that it even existed, let alone what it means.
This is the browser's way of saying “You told me that bankruptcy is a thing but I don’t know what it means.” We can arbitrarily declare variables like this, but we did not assign it a value, which is why it outputs “undefined.”
Now that we’ve told the browser that the variable “bankruptcy” exists and has a value, the browser returns what we expect: the string, “I didn’t say it. I declared it.”
We can also use, update, and change the variables just as we would the normal data type. If you’re updating the variable, make sure that you’re also saving it back to the same variable!
Let’s increment the number of times Michael Scott has seen the movie The Devil Wears Prada (hint: it’s a lot).
Semicolons in JavaScript are kind of like the periods at the end of sentences. They separate and terminate each instruction. Check out Codecademy’s blog if you want to read more about the ins and outs of JavaScript semicolons, but a safe bet is to add a semicolon to the end of each line of JavaScript.
Types of Variables: Local vs. Global
In JavaScript, variables can be local or global depending where they are declared. Local variables are declared inside functions (which we will talk about in a second), so they can only be accessed within that specific function. Global variables are declared outside of any function, which means they can be accessed (and updated) by any other functions.
To see this in action, copy and paste the follow in your JavaScript file and then open your console in Chrome.
If you try to type “global_var” in your console, you will see “hello world” returned. If you do the same with “local_var” in your console, you will see that it is not defined because it is inside a function. But if you call the function by typing “localVarFunc()” in the console, you’ll see “hello from the other side.” This next section on functions will help solidify the difference between local and global scope.
What we do
We’ll break down the parts of a JavaScript function, demonstrate its usefulness by writing a few of our own, and provide a few tips and tricks for writing good, clean code.
Why we do
JavaScript functions are self-contained chunks of programs that perform a specific function (haha get it?). They’re blocks of code you can set aside until you need them—some future, imagined functionality. Functions make programs more manageable and readable, and can be used again and again to accomplish the same task in many different situations.
How we do
Functions, like variables, must be declared before they can be used, or called . Functions can take in values, known as parameters , and can return values.
A function has to be declared with a descriptive name, and all the code of the function goes inside the curly braces:
Below is an example of a function that determines if a number is divisible by 2:
This function determines if a number is divisible by the number 2 (we will dive more into if/else statements in the next part of this lesson). First, we declare the function by using the word “function” and giving it a name “divisibleByTwo.” Function names should be descriptive about what they do. The function takes a parameter (num), meaning it expects some kind of input when it is called. This input num is then used inside the function to determine the result to be returned. If the number is divisible by 2 (if the remainder of the division of the number by 2 is 0, then it is divisible by 2), then the result is “yes”. Otherwise the result is “no.” We update the result variable accordingly, and finally return that result at the end of the function. Notice that we don’t have any console.logs in this function. Let’s see what that means.
To call (or use) a function, type the following the console:
Alternatively you can add the following to your script.js:
This means you can either call functions on the fly once the page has loaded or call the function in the script file and store/output the result. If you simply had this line in your script file:
you won’t see anything in the console because in the original function, we don’t use any console.logs. We only “return” a result. That result exists, but it won’t be visible to us until we console.log it as a variable or its equivalent console.log(divisibleByTwo(4)); As seen in the above example, we stored it in the variable “result” and then logged it to the console.
A good principle in programming is DRY: Don’t Repeat Yourself. If you find yourself copying and pasting code or repeating lines of code, you might want to break out that chunk into its own function. By abstracting and generalizing your code into various functions, they can be reused throughout your code because each component accomplishes a specific task. This will help you manage your code as your application get more and more complex.
What we do
We’ll cover another important JavaScript data type: arrays . We’ll also introduce for loops as a way of running the same portions of code multiple times.
Why we do
Arrays are useful ways of storing a bunch of related items together in a single variable. Think of them as a kind of list. This simplifies code—one variable for a whole grocery list, instead of 20 variables for every kind of frozen pizza imaginable. Then you’re able to execute the same block of code (like a function called “buyAllOfTheThings”) for each unique value stored in the array.
How we do
An array is a JavaScript object that stores several values separated by commas, all inside square brackets. Arrays can contain a mix of data types and objects—numbers, strings, other objects, etc. We can declare arrays by directly assigning values to it. In this example, the variable netflix_shows is our to-watch list of Netflix original series.
Or we can initialize an empty array and add items to it later. To add values to the end of an array, you can use the “push” function. Let’s add the latest seasons of Love and Daredevil:
You can also add values to certain slots by referencing the index number , or their spot on the list:
Yes, we start counting at 0. This is because arrays are zero-indexed . Use square brackets for the index you want to access in the array. When working with arrays, feel free to throw in a console.log(netflix_shows) to periodically to check if things are as expected, or check up on a specific index like so:
You can also update values in an array by writing over an existing index:
Be careful not to write to indexes that are outside of the array’s range, otherwise the array will just fill everything in between with “undefined”. For example, if we were to write the value “bloodline” to index 6:
Let’s write another show to netflix_shows[5] so our watch-list only contains actual television shows:
There are also a few handy built-in ways of getting useful information about arrays. The length property will return the length (number of items) of an array. Let’s see how many Netflix shows we currently have in our to-watch list:
Seven shows is a lot of TV to binge on! Pro tip: start with Master Of None.
Remember, because arrays are zero-indexed, the length of the array will always be 1 greater than the last index. So if an array has 7 items, the last index will be 6.
The sort method will sort strings into alphabetical order and numbers into ascending order. The A.V. Club has a ranking of the best episodes of Master Of None stored in the variable episode_ranking. Since we’re just watching the series in order, let’s rearrange the first half of the season in ascending order.
We can also do the same with the episode names so that they’re in alphabetical order, because why not?
This time, the array is sorted in proper alphabetical order!
This would be the worst way to watch TV, but let’s mix up episode numbers and names in the same array:
The length function is a property, so that means we just access that information about that object without trying to change the object itself. The sort method is a function that that is changing something about the object we apply it to, which is why we have the parentheses after arr.sort().
For Loops
Now that we know how to create, access, and update arrays, let’s look at how loops can make our lives a whole lot simpler. Loops are part of control flow , which are types of logical statements that control the flow of execution of a program (we’ll dive more into this in the next section).
There are many types of loops, but for now we’ll talk about the most useful one: the for loop.
The for loop is used to iterate over many different values and execute code for those values. In other words, it loops through the array, applying the function to every item inside, one by one—much like you might do a batch operation to resize every photo in a certain folder.
The structure of a for loop is the following:
- Initialize the looping variable by setting the starting value. This is executed at the very beginning of the for loop only once. It most commonly starts at 0, which is the first item in the array.
- The looping condition is a logic statement that defines the condition under which the for loop should continue running; it will run as long as this returns true. This runs before each iteration of the for loop to determine whether or not to continue with the code block inside the { } or whether to continue the program’s normal flow of execution.
- The incrementing variable defines the way to increment the looping variable and is executed each time after the code block runs. Without this, we would be thrown into an infinite loop!
Let’s see this in action with our previous netflix_shows example:
This is the most common way to iterate through an array.
-
Initialize the looping variable by setting the starting value. This is executed at the very beginning of the for loop only once.
We set the initial variable to be 0, since arrays are zero-indexed.
-
The looping condition is a logic statement that defines the condition under which the for loop should continue running. This runs before each iteration of the for loop to determine whether or not to continue with the code block inside the { } or whether to continue the program’s normal flow of execution.
The next part says the loop will run through the entire array, and no further. The logic statement i < netflix_shows.length ensures that even if we add or subtract from our array, we’ll run this code block until we reach the end. Every time this condition holds true, the code inside the for statement is executed: console.log(netflix_shows[i]). Since i changes every time the loop runs, we’ll get a different show every time.
-
The counting variable defines the way to increment the looping variable and is executed each time after the code block runs. Without this, we would be thrown into an infinite loop!
After each iteration, we increment the counter variable, i. We increase it by 1 (the ++ is a shorthand for i += 1 or i = i + 1) each time the for loop runs. Initially, it is 0, and then 1, 2, ... and is incremented until we reach 5, which is the length of our list. At this point, the looping condition from (2) is not met (5 is not less than 5), so we exit the for loop. This means that we go through all Netflix shows in our netflix_shows array until we reach the end.
We can also start from the end of the array and decrement one by one:
Or skip every other element:
We can also use the netflix_shows array values in more creative ways. How would you write a for loop that appends the string “I’m currently hooked on” before every Netflix show?
What we do
We’ll talk about control flow, which determines the order in which program statements and functions are executed. We’ll also work on ways of controlling the flow of execution in our program through specific kinds of conditional statements.
Why we do
Sometimes you want to write a single function that can handle a variety of cases or situations. Take traffic, for example. You might want to write a rule for the stoplight that tells cars what to do based on the color of the light. These rules (green means go, red means stop) are essentially real-life forms of control flow. The light controls the flow of traffic, just like we’ll control the flow of our code.
In other words, control flow allows us to write more complex functions. Rather than being required to write statements that have to be done in a certain order, we can instead write control flow statements that pass variables around and run certain code blocks only under certain conditions.
How we do
We’ll cover three ways to control this traffic, or control flow statements: if/else, switch, and while statements.
-
If/Else
An if/else statement will execute one section of code if a condition is true, and another section of code if the condition is false.
if (some condition) { // code to be executed if condition is true } else { // code to be executed if condition is false } We can use an if/else statement to illustrate the basic rules of the road:
var stopLight = “red”; if (stopLight == “red”) { console.log(“Stop”); else { console.log(“Go”); } You can add additional “else if” statements if there are different types of conditions to be met. Since our first if/else statement only specifies stopping on red, we can be more specific about by checking for the other colors of stoplights:
if (stopLight == “red”) { console.log(“Stop”); } else if (stopLight == “green”) { console.log(“Go”); } else { console.log(“Clear the intersection”); } Notice that since we specified the cases for a red or green stoplight, we don’t need to explicitly check for the yellow stoplight and instead just use an all-encompassing “else” statement. These are mutually exclusive; if red or green is triggered, yellow won’t be. So we can assume it’s all that’s left.
-
Switch
A switch statement is like a more complicated if/else statement. The switch statement executes a specific “case” (block of code) depending on the expression. There is always a default case, and every other case has to end with the line “break” in order to break out of that case.
switch (expression) { case x: code to be executed break; case y: code to be executed break; .... default: default code to be executed } Let’s see this in action with our driving example:
switch (stopLight) { case “red”: console.log(“Stop”); break; case “green”: console.log(“Go”); break; case “yellow”: console.log(“Slow down or speed up depending on your current speed”); break; default: console.log(“Yikes! Someone needs to fix the stop light. Proceed with caution.”); } In this case, we specified the three stop light colors of red, green, and yellow, and what to do in response to each of them. The default case shows an error because if the stopLight is any other color besides red, green, or yellow, something must be wrong. But not all switch statements will use the default case as an error case. Sometimes it might just be used to deal with a generic case that hasn’t been specified.
Switch statements can essentially be rewritten as if/else statements and vice versa. If this is the case, in what cases would you use one over the other? Switch statements handle a larger number of cases than a bunch of “else if” statements. They also generally have a better performance (run faster) than if/else statements.
-
While
A while statement executes a certain block of code while a condition holds true. Similar to for loops, be careful that you don’t accidentally get stuck in an infinite loop.
while (condition) { code to be executed } This while statement basically says that while the stop light is green and there is no stop sign, you can continue driving.
Can you spot what’s wrong with this example?
while (stopLight == “green” && stopSign == false) { console.log(“Go”); } The car will never stop! The while statement will go into the dreaded infinite loop. All we need to do to fix this is add in some statement that will cause the loop to exit. Because an and statement requires both conditions to be true, we only need to change the condition of the stopLight or the stopSign. We’ll introduce a stop sign into the way of our car to get it to stop.
while (stopLight == “green” && stopSign == false) { console.log(“Go”); stopSign = true; }
Play around with more JavaScript functions, variables, and control flow by building something fun - all of the following can be built with HTML, CSS, and JavaScript!
- Soundboardt - click on different images to play Beyoncé music samples
- Drake Weather - swap out Drake’s Nothing Was the Same album cover based on the weather forecast in your area